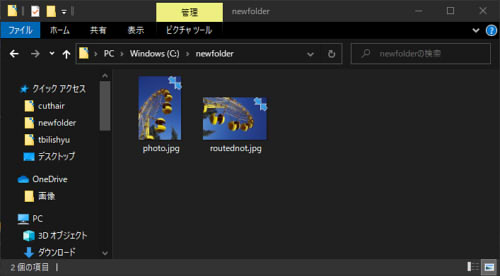
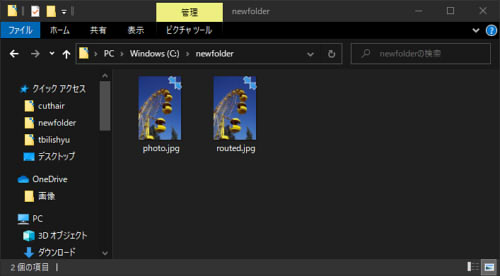
写真を縦で撮ることあると思います。縦で撮るとカメラによって2種類の保存のされ方の可能性があります。例えば800x 600のカメラがあったとして、それを縦で撮る場合です。
- 600×800の画像が保存
- 800×600かつExif情報で回転した記憶がある画像が保存
一眼レフカメラで縦写真を撮るとほぼ100%②後者です。スマホではたまに①があります。自分のmotoloraはそうです。

編集ソフトで開くとぶっ倒れてたりネットに上げるとぶっ倒れたりして面倒です。pythonでExif情報がありかつ開店した縦写真の場合、直して新しく保存してみました。
上書きでも良いんだけどそこはこだわりです。めんどいので完成コードから行きます。
環境
windows10, Anaconda, Python3
Pillow インストール済
完成コード(写真1枚だけ処理)
一番原始的な方法。コールバックもファンクションみたなのもなんも使ってません。
|
1 2 3 4 5 6 7 8 9 10 11 12 13 14 15 16 17 18 19 20 21 22 23 24 |
from PIL import Image from pathlib import Path from PIL.ExifTags import TAGS fullpath = 'C:/newfolder/photo.jpg'#テスト用フォルダは予め作って path1 = Path(fullpath).parent img =Image.open(fullpath) try: exif = img._getexif() except AttributeError: print('errrr') #Exif読み取る exif_table = {} for tag_id, value in exif.items(): tag = TAGS.get(tag_id, tag_id) exif_table[tag] = value orientation = exif_table.get('Orientation', 1) #縦の場合はImage.ROTATE分け if orientation == 8: img = img.transpose(Image.ROTATE_90) elif orientation == 6: img = img.transpose(Image.ROTATE_270) stname = ('rotaed') #新しいファイル名 nfullpath = str(path1)+'\\' + stname +'.jpg' img.save(nfullpath, quality=80) |
できました。
サンプルコードを説明していきます。

説明
最初にExif情報を取ってforで取り出しています。例えばこんな感じでPrint してみたら色々出て来ます
11行目からです。
Exifを全部見てみる例
|
1 2 3 4 5 6 7 8 9 10 11 12 13 14 15 16 |
from PIL import Image from pathlib import Path from PIL.ExifTags import TAGS fullpath = 'C:/newfolder/photo.jpg'#テスト用フォルダは予め作って path1 = Path(fullpath).parent img =Image.open(fullpath) try: exif = img._getexif() except AttributeError: print('errrr') #Exif読み取る exif_table = {} for tag_id, value in exif.items(): tag = TAGS.get(tag_id, tag_id) exif_table[tag] = value print(exif_table)#ここで全部見る。 |
こんな感じの異様に多いのが出て来ますね。
{‘ExifVersion’: b’0230′, ‘ComponentsConfiguration’: b’\x01\x02\x03\x00′, ‘FlashPixVersion’: b’0100′, ‘DateTimeOriginal’: ‘2019:11:30 08:32:34’, ‘DateTimeDigitized’: ‘2019:11:30 08:32:34’, ‘ExposureBiasValue’: (0, 10), ‘ColorSpace’: 1, ‘MeteringMode’: 5, ‘ExifImageWidth’: 7360, ‘Flash’: 16, ‘FocalLength’: (6800, 100), ‘ExifImageHeight’: 4912, ‘ExifInteroperabilityOffset’: 31984, ‘FocalLengthIn35mmFilm’: 68, ‘SceneCaptureType’: 0, ‘Make’: ‘RICOH IMAGING COMPANY, LTD. ‘, ‘Model’: ‘PENTAX K-1 Mark II ‘, ‘Contrast’: 2, ‘Orientation’: 8, ‘YCbCrPositioning’: 2, ‘SubjectDistanceRange’: 3, ‘SensingMethod’: 2, ‘Copyright’: ‘GeekTravelInc.’, ‘FileSource’: b’\x03′, ‘XResolution’: (300, 1), ‘YResolution’: (300, 1), ‘ExposureTime’: (1, 80), ‘FNumber’: (45, 10), ‘SceneType’: b’\x01′, ‘ExposureProgram’: 2, ‘GPSInfo’: {0: b’\x02\x03\x00\x00′, 1: ‘N’, 2: ((41, 1), (402975, 10000), (0, 1)), 3: ‘E’, 4: ((44, 1), (578391, 10000), (0, 1)), 5: b’\x00′, 6: (48160, 100), 7: ((4, 1), (32, 1), (34989, 1000)), 8: ’09’, 9: ‘A’, 10: ‘3’, 12: ‘K’, 13: (69, 100), 14: ‘T’, 15: (29011, 100), 16: ‘T’, 17: (11954, 100), 18: ‘WGS-84′, 27: b’ASCII\x00\x00\x00GPS’, 29: ‘2019:11:30’}, ‘PrintImageMatching’: b”PrintIM\x000300\x00\x00!\x00\x01\x00\x16\x00\x16\x00\x02\x00\x01\x00\x00\x00\x03\x00\xd6\x00\x00\x00\x07\x00\x00\x00\x00\x00\x08\x00\x00\x00\x00\x00\t\x00\x00\x00\x00
長すぎ省略
Orientation というのがありますね。Orientationだけ取得する必要があります。
Orientationだけ取得
|
1 2 3 4 5 6 7 8 9 10 11 12 13 14 15 16 17 |
from PIL import Image from pathlib import Path from PIL.ExifTags import TAGS fullpath = 'C:/newfolder/photo.jpg'#テスト用フォルダは予め作って path1 = Path(fullpath).parent img =Image.open(fullpath) try: exif = img._getexif() except AttributeError: print('errrr') #Exif書き出し exif_table = {} for tag_id, value in exif.items(): tag = TAGS.get(tag_id, tag_id) exif_table[tag] = value orientation = exif_table.get('Orientation', 1) #Orientationだけ取得,getする print(orientation)#オリエンテーションだけ取得 |
コンソールにorientation がプリントできますかね。
1が横写真、8と6が縦です。
後はorientationに応じてifで分岐する、あるいはもっとオサレでクールな分岐とか配列とかまあなんか好きにしてください。
if orientation == 8:
img = img.transpose(Image.ROTATE_90)
elif orientation == 6:
img = img.transpose(Image.ROTATE_270)
複数画像フォルダ内を一気に処理したい
写真1枚だけローテーションするのは芸がありません。フォルダ内全部判別して保存するとかなんかそんなのはforで回していけばいいと思います。
|
1 2 3 4 5 6 7 8 9 10 11 12 13 14 15 16 17 18 19 20 21 22 23 24 25 26 27 28 29 30 31 32 33 |
from PIL import Image from pathlib import Path import os from PIL.ExifTags import TAGS thisfile = 'C:/newfolder/photo.jpg' path1 = Path(thisfile).parent os.chdir(path1) files = os.listdir() stname = ('routed') #change naame you like stnum = 1 for file in files: fullpath = str(path1) +'\\'+ file name, ext = os.path.splitext(file) img =Image.open(fullpath) try: exif = img._getexif() except AttributeError: print('errrr') #Exif取得 exif_table = {} for tag_id, value in exif.items(): tag = TAGS.get(tag_id, tag_id) exif_table[tag] = value orientation = exif_table.get('Orientation', 1) if orientation == 8: img = img.transpose(Image.ROTATE_90) elif orientation == 6: img = img.transpose(Image.ROTATE_270) nfullpath = str(path1) +'\\' + stname +str(stnum)+ '.jpg' img.save(nfullpath, quality=80) stnum += 1 |
ファイル名が被らないようにいろいろしてます。めんどいです。
変数が汚いのは僕には技術者倫理が無いからです。ブログに上げとけばほら、タブレット盗まれても回復できるし。ならgithubにでもあげろや。

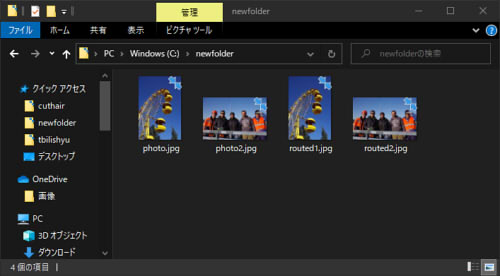
いっぱいできる
おわり。
参考
Python Tips:画像の Exif データを取得したい – Life with Python
https://www.lifewithpython.com/2014/12/python-extract-exif-data-like-data-from-images.html
Python3でJPEG画像のExifを取得し、回転方向を修正する
Python + Pillow(PIL)で画像の回転を行う(rotate, transpose) – Symfoware


